How to connect p5js to an arduino to sense or control the real world
How to control or measure something in the real world with p5js and a Arduino (or esp32 etc.)
For the Artificial Intelligence workshop at Humtek spring 2025
Until recently, it was difficult to control hardware from javascript/p5js in a browser. Now however it is reasonably easy, as hte browser Chrome supports javascript talking to a hardware serial port. (other browsers may or may not work)
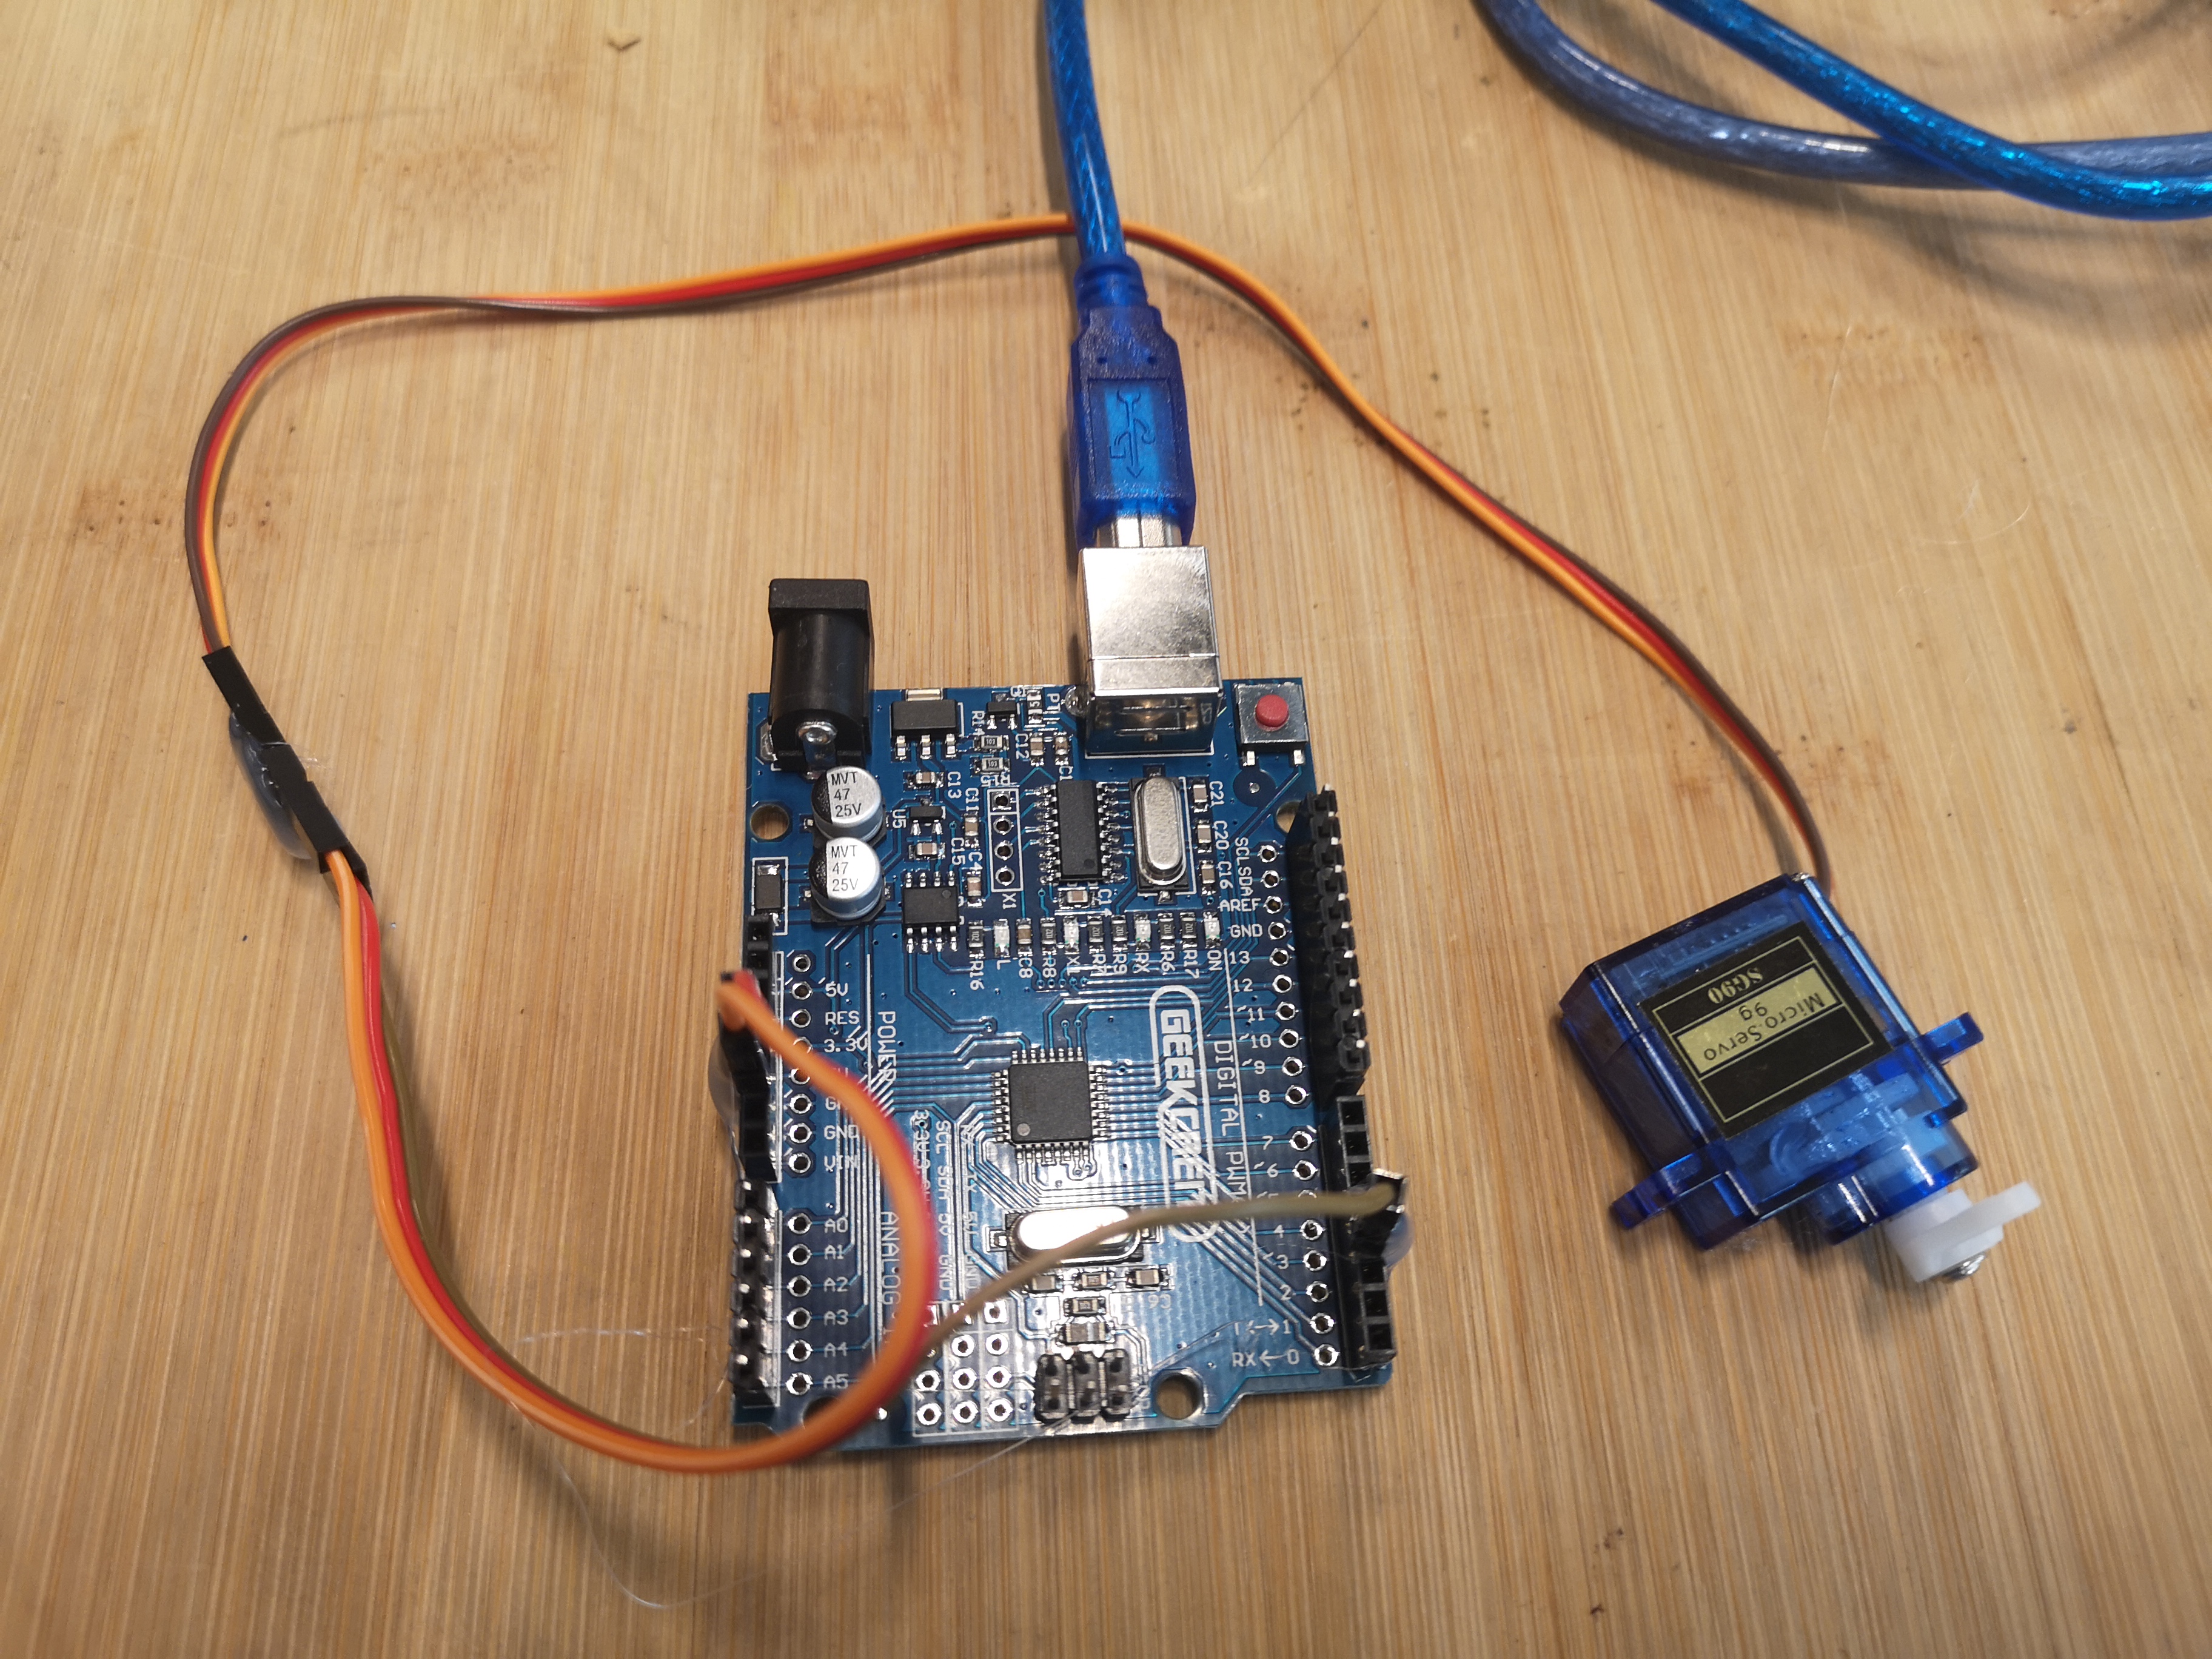 In this example, connect a servo to pin 3, 5V and GND
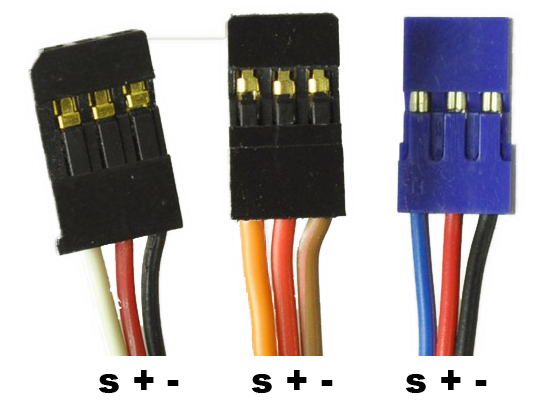
Pinout/colours (http://www.pitch-play.nl/tips-and-tricks/servo-wires/)
To control or sense something in the real world from p5js, you need four things:
1) p5js sketch (below)
2) Arduino sketch (below)
3) Arduino compatible board (e.g. esp32, esp8266 also work fine)
4) Actuators or sensors to connect to the arduino board. (in this example a servo.
This solution is as simple as possible and does not use higher level abstraction layers like firmata, json etc.
p5js code:
(modified from https://learn.hobye.dk/kits/iot-tutorial ESP32/Arduino SERIAL to p5 (Directly))
Here:
https://editor.p5js.org/nicolasp/sketches/qQt7MMBt1
Or here:
// p5js code to send data to Arduino

let serialAvaliable = false;
let serialInput = "";


function setup() {

  createCanvas(400, 400);
  print("click on sketch canvas and press c to select serial port and connect")

}


function keyPressed() {

  if (key == "c") {

    serialConnect();

  }

}


var timer = 0;
var variable1 = 20;
var variable2 = 0;

function draw() {

  background(220);

  // prints the serial input buffer when the serialAvaliable flag is true

  if (serialAvaliable) {

    serialAvaliable = false;

    print(serialInput);

    serialInput = "";

  }


  //Send data to the arduino every 2 seconds

  //- if data from Arduino shows up in the console it means that the arduino recieved it and returned some sensor values

  if (millis() - timer > 2000) {

    timer = millis();

    variable1 = variable1 + 5;

    serialWrite(variable1);
    serialWrite(",");
    serialWrite(variable2);
    serialWrite("\n");

  }

}


// XXXXXXXXXXXXXXXXXXXXXXXXXXXXXXXXXXXXX

// SERIAL COMMUNICATION FUNCTIONS BELOW

// XXXXXXXXXXXXXXXXXXXXXXXXXXXXXXXXXXXXX

let port;

let reader;

let inputDone;

let outputDone;

let inputStream;

let outputStream;

let portIsOpen = false;


async function serialListen() {

  if (portIsOpen) {

    while (true) {

      const { value, done } = await reader.read();


      if (value) {

        serialAvaliable = true;

        serialInput = serialInput + value;

      }

      if (done) {

        console.log("[readLoop] DONE", done);

        reader.releaseLock();

        break;

      }

    }

  }

}


async function serialConnect() {

  if (navigator.serial) {

    port = await navigator.serial.requestPort();

    await port.open({ baudRate: 9600 });


    const decoder = new TextDecoderStream();

    inputStream = decoder.readable;

    inputDone = port.readable.pipeTo(decoder.writable);

    reader = inputStream.getReader();


    const encoder = new TextEncoderStream();

    outputDone = encoder.readable.pipeTo(port.writable);

    outputStream = encoder.writable;


    portIsOpen = true;

    print("Port is open");

    serialListen();

  } else {

    print("Serial not compatible with the browser you are using :/");

  }

}


function serialWrite(line) {

  if (portIsOpen) {

    // CODELAB: Write to output stream

    const writer = outputStream.getWriter();


    writer.write(line);


    writer.releaseLock();

  }

}
Arduino sketch code:
// p5js sketch should send data like 40,1\n (=newline)
// this should move servo to 40 degrees and make LED on pin 2 (if exists) light up
// Arduino sends data like 130,400\n (=newline), these are the values of the analog in pins
// so this sketch supports 4 things, you probably only need one of them
// but the data still needs to be in this format: 20,0\n
// if you send any other data, you may need to reboot the arduino, as it does not handle other data formats

#include <Servo.h>

Servo myservo;  // create servo object to control a servo. Twelve servo objects can be created on most boards

int pos = 0;  // variable to store the servo position. May be 0 to 180

int extraLedPin = 2;

void setup() {
  // Start serial communication so we can send data over the USB connection from our p5js sketch
  Serial.begin(9600);
  myservo.attach(3);  // attaches the servo on pin 3 to the servo object
  pinMode(LED_BUILTIN, OUTPUT);
  pinMode(extraLedPin, OUTPUT);

}

void loop() {
  // wait for data from p5 before doing something
  while (Serial.available()) {
    digitalWrite(LED_BUILTIN, HIGH);  // led on while receiving data

    int variable1 = Serial.parseInt();
    int variable2 = Serial.parseInt();
    if (Serial.read() == '\n') {

      if(variable1 >= 0 && variable1 <= 180){
        myservo.write(variable1);  // tell servo to go to position in variable1
      }

      digitalWrite(extraLedPin, variable2);

      // This is how we send sensor data back to the p5 sketch
      int sensor = analogRead(A0);
      delay(5);
      int sensor2 = analogRead(A1);
      delay(5);
      Serial.print(sensor);
      Serial.print(',');
      Serial.println(sensor2);
    }
  }


  digitalWrite(LED_BUILTIN, LOW);
}